Lightning network is a Layer 2 protocol that sits on top of the bitcoin/litecoin blockchain. It enables instant, low cost, anonymous payments by routing payments through point to point channels in a similar way to what the correspondent banking system uses today to transfer fiat currency.
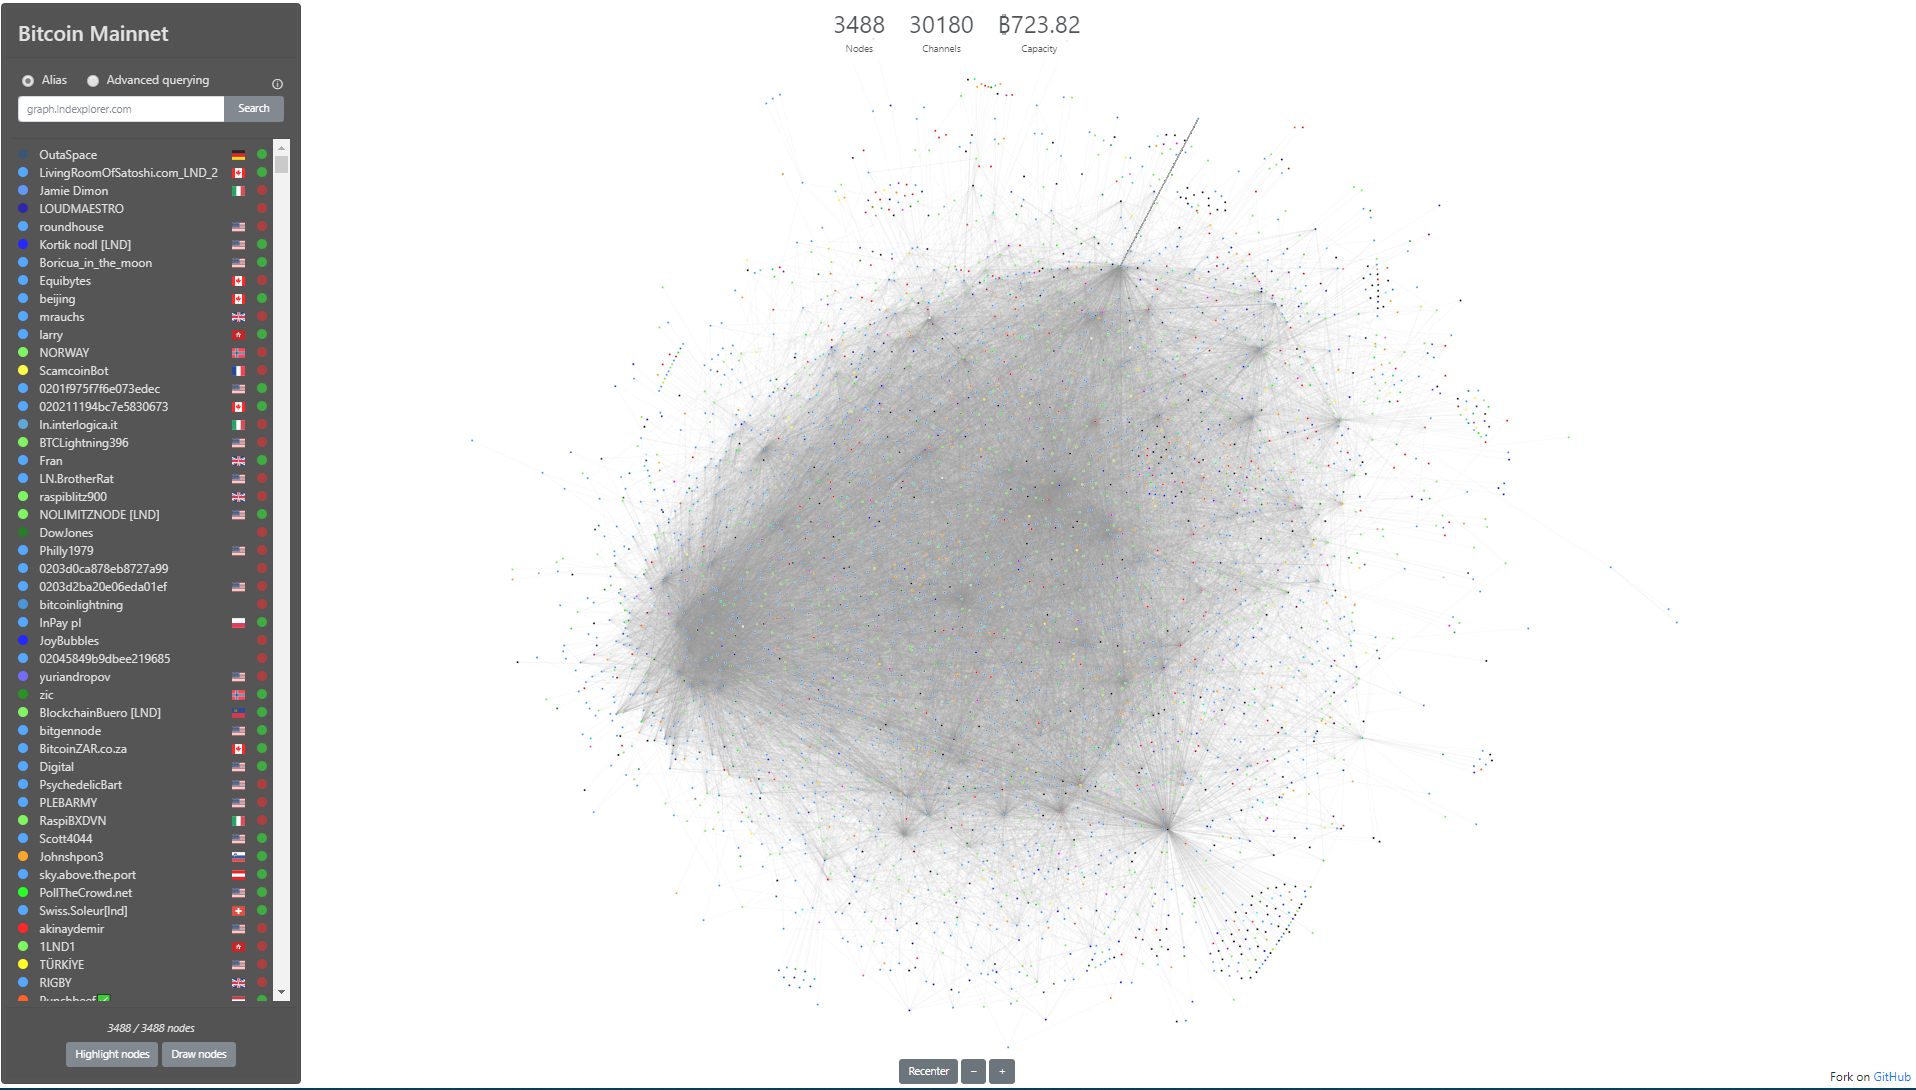
You can check out the map of channels of the lightning network at https://graph.lndexplorer.com/ as of today, there are 3488 nodes
In order to set up your lightning network node, first you need to set up your bitcoin node. Here you have simple instructions to set it up by compiling it from source.
First we clone the git repository for the bitcoin core node
sudo apt-get install git
mkdir $HOME/src
cd $HOME/src
git clone https://github.com/bitcoin/bitcoin.git
you will need libzmq3 in order for the lighning node to communicate with your bitcoin node, so we need to install libzmq3-dev
sudo apt install libzmq3-devnow we configure and install the node
cd bitcoin
./autogen.sh
./configure
make
sudo make install
bitcoind is installed! 🙂 now we need to create a config file and create an rpc user and password so you can communicate with your bicoind node
./share/rpcauth/rpcauth.py roge
#This command will give you the user and password you will need to include in your bitcoin.conf
String to be appended to bitcoin.conf:
rpcauth=roge:793845a197311a324722f93e8360e166$3dfb9011930a6fcb85c99e0e1ad2e0309958b2aa863955faae831e0eeec3894f
Your password:
34ZofsEbG95rWITDv8w03crrzIYBioGAKfMqDq1yY1A=
Let’s create a directory where all bitcoin data will be stored. Be warned that this directory will hold a copy of the whole bitcoin blockchain which is as of today 243 GB.
We will copy a bitcoin.conf file to the bitcoin data folder
mkdir /opt/bitcoin-data/
cp $HOME/src/bitcoin/share/examples/bitcoin.conf /opt/bitcoin-data/
now we edit the bitcoin.conf file, the following variables are important
vi /opt/bitcoin-data/bitcoin.conf
#set testnet to 1 if you'd like to run a node for testing purposes not using real bitcoins.
testnet=1
#set daemon=1 to launch bitcoind as a daemon running in the background
daemon=1
#set rpcauth to the rpcuser you created earlier
rpcauth=roge:793845a197311a324722f93e8360e166$3dfb9011930a6fcb85c99e0e1ad2e0309958b2aa863955faae831e0eeec3894f
We are set. Now we can start our bitcoind node with the following command. It could take one or two days to synchronise with the bitcoin blockchain.
bitcoind --datadir=/opt/bitcoin-data/ -rpcuser=roge -rpcpassword=34ZofsEbG95rWITDv8w03crrzIYBioGAKfMqDq1yY1A=you can monitor progress looking at debug.log
tail -333f /opt/bitcoin-data/debug.logyou can connect to your bitcoind node using bitcoin-cli which allows you to manage your node
watch bitcoin-cli -datadir=/opt/bitcoin-data/ -rpcuser=roge -rpcpassword=34ZofsEbG95rWITDv8w03crrzIYBioGAKfMqDq1yY1A= getblockchaininfoNow encrypt your wallet don’t forget this password. Write it down on a piece of paper and store that paper somewhere safe.
bitcoin-cli -datadir=/opt/bitcoin-data -rpcuser=roge -rpcpassword=34ZofsEbG95rWITDv8w03crrzIYBioGAKfMqDq1yY1A= -stdin encryptwallet
writehereyoursupersecretpassword
Ctrl-d
now you can get an address where to deposit bitcoin in (you can buy these bitcoins in exchange for fiat currencies such as Euros or Dollars in exchanges like kraken.com or blockchain.org) do not send real bitcoin to a testnet wallet, they will be lost. You can get free testnet bitcoins by googling testnet bitcoin faucet. Here’s one (link)
bitcoin-cli -datadir=/opt/bitcoin-data -rpcuser=roge -rpcpassword=34ZofsEbG95rWITDv8w03crrzIYBioGAKfMqDq1yY1A= getnewaddress
#This will return the new address where you can send bitcoin to
# the command will return something like 3NUvF2fvitxrU1fY43rCQivx9RtCgvXuEb
Once you have transferred bitcoins to your wallet you can see your balance
bitcoin-cli -datadir=/opt/bitcoin-data -rpcuser=roge -rpcpassword=34ZofsEbG95rWITDv8w03crrzIYBioGAKfMqDq1yY1A= getbalance
#This command will output your bitcoin balance
0.00001
In order to transfer bitcoins to another address you first need to unlock your wallet for x seconds
bitcoin-cli -datadir=/opt/bitcoin-data -rpcuser=roge -rpcpassword=34ZofsEbG95rWITDv8w03crrzIYBioGAKfMqDq1yY1A= -stdinn walletpassphrase
enteryoursupersecretpassword
enternumberofsecondsthatthewalletwillremainunlocked
Ctld-d
Now you can transfer bitcoin to another wallet
bitcoin-cli -datadir=/opt/bitcoin-data -rpcuser=roge -rpcpassword=34ZofsEbG95rWITDv8w03crrzIYBioGAKfMqDq1yY1A= sendtoaddress enterthedestinationaddress entertheamounttotransferYou can find all the bitcoin-cli commands here: https://en.bitcoin.it/wiki/Original_Bitcoin_client/API_calls_list
Now that our bitcoin node is ready, let’s set up our lightning network node! 🙂

2 thoughts on “Setting up lightning network [1/3] – Set up your bitcoind node”